The following is a guide to making coffee on a camping trip, including tips for the best equipment and how to make an excellent cup of joe while out on the trail.
If you’re like me, there’s nothing better than waking up the morning of a camping trip with a hot cup of coffee. However, we have to do things a little differently when it comes to camping.
That’s right – no fancy coffeemaker here! Instead, I’m going to show you some excellent ways that you can still get your fix while roughing it outdoors.
First, let’s talk about what coffee beans you need and how to grind them. Then we’ll get into what kind of gear you’re going to need.
What Coffee Beans Should You Use for a Camping Trip
The taste of freshly ground coffee beans is incomparable.
Pre-ground coffee can oxidize quickly because it’s more exposed to the air than a whole coffee bean, which means you’re paying for a flavorless cup. Plus, most people don’t know how long their old grounds have already sat in an open container and passed their prime.
Buying whole beans and grinding them just before you need to use them is an excellent general practice. It’s not completely necessary, but if you’re going to be out in the woods, it’s nice to have the best possible coffee you can.
Whole beans are available everywhere coffee is sold, so why not incorporate them into your camping routine.
If you’d like to read more about coffee oxidation, I have an in-depth article about why coffee goes stale.

How To Grind Your Coffee Beans While on a Camping Trip
Depending on how long you’re camping, you can grind all the beans you think you’ll need. An easier way is to bring a small portable hand coffee grinder. Take a look at GSI outdoor coffee grinder.
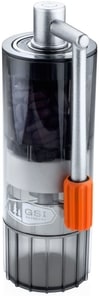
This is the perfect compact grinder for camping and backpacking. Coffee and camping are easy thanks to the foldable handle and nesting design.
Whether you like a coarse or fine grind (we’ll get into this later down the article with different methods), the durable burr grinder lets you brew your favorite cup. Made from the highest performing, durable co-polyester weighing only 9.3 ounces, the Javamill goes wherever your adventure takes you.
Tips for Storing Coffee
If you do decide it is best to grind your coffee at home, here are a few tips on the best ways of getting it to the campsite:
- Vacuum Seal: A small pouch for each day. This will depend on how many people will be drinking coffee and how long you’ll be at your campsite. If you already have a vacuum sealer, this is a great option.
- Ziploc Bags: This is kind of a no-brainer, but I suggest using freezer bags as they are thicker than the normal ones. Also, double bag for extra protection!
- Hard Coffee Container: If you’re car camping or have a short hike to the campsite, a hard coffee container will keep your ground fresh, dry, and dust-free. Take a look at the Veken coffee canister. It’s stainless steel and has a silicon rubber seal, so nothing leaks in or out.
Use Clean Water for Your Camping Coffee
Coffee is mostly water, about 98.75% water. Using clean, good-tasting water will make a significant difference in how your coffee tastes.
If you’re pulling water from a lake or elsewhere in the woods, you can purify it with purification tablets. My purified tablets are from portable Aqua. I have never gotten sick when using these and pulling water out of a questionable area.
Make sure to read the instructions thoroughly. More importantly, give the allotted time needed to dissipate the taste of the tablets.
This will ensure none of the off taste will be noticeable in your coffee.
Use a Water Filter for Camping
If you don’t want to use tablets to clean your water, make sure to grab a water filter. Not all filters are made the same. Some areas around the world require different types of filters due to the different parasites in the area.
For a further discussion of filters for camping, take a look at CleaverHikers water filter guide.
There’s a lot of discussion about water filters for camping, but they are usually really about small hiking filters, lightweight filters for individuals. Since this article is about camping coffee and usually making coffee for a group, take a look at the LifeStraw Flex Advanced Water Filter with Gravity Bag.
The bag will hold 3.7 liters and go through 26 gallons before the filter needs to be replaced. That’s a lot of coffee!
Boil The Water
Make sure that any water you gather is clean. Bring your water to a rolling boil for at least one minute.
At altitudes above 5,000 feet (1,000 meters), boil water for three minutes. After cooling (all the water you don’t need for coffee at the moment), make sure to store it in a clean, covered container.
Best Ways To Make Coffee While Camping
I’m going to break this guide down into a few different categories.
Let’s get into each category!
The Easiest Cup to Make Camping
The easiest and simplest way is using instant coffee. Just like it is at home. You might be thinking, yuck! But instant coffee is not as bad as it use to be.
There’s a lot of variety now and if you haven’t tried instant in a long time, making some while on a camping trip is a great opportunity. If you’re going this route, check out what Starbucks has to offer, as well as Death Wish instant.
I’m not going to spend a long time writing about instant coffee because you’re here for better options.
My Preferred Method for Camping Coffee
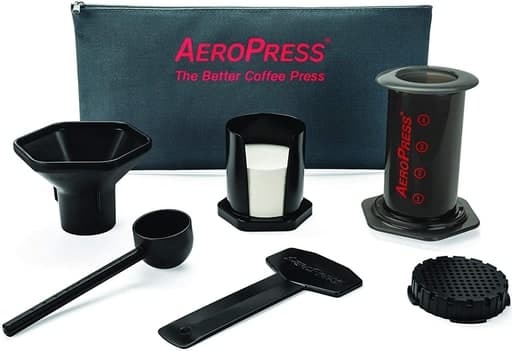
I love Aeropress, and I even use this at home quite a bit. Aeropress even makes a slightly smaller unit, the AeroPress Go portable travel coffee press. It’s a smaller coffee maker with a built-in mug that doubles as a collapsible travel case.
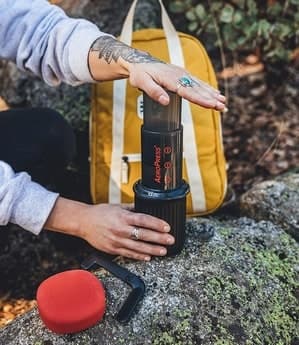
If you’re informal with an Aeropress, it makes a clean cup of coffee that is also strong. I found this after searching for something that will work on backpacking trips. I’ve been thrilled with it!
Making camping coffee for a large group
A cowboy coffee pot or a coffee percolator.
Nothing beats making coffee the cowboy way for a large group. It’s one of the simplest ways to make coffee as you only need a large pot (and coffee, of course).
I’ll go into a little here, but if you want a real deep dive into how to make cowboy coffee, I have an in-depth article here, How To Make Coffee The Cowboy Way!

How to make cowboy coffee:
- Fill the pot with cold or hot water. Preferably hot, but that would add another step. Keep in mind to leave room to avoid spillover while heating.
- Put your pot of water on the flame. This can be high heat because we’re just warming the water at this point.
- Once the water starts to boil, remove it from the flame for 30 seconds. It will lower the water temperature to around 200 degrees (the ideal temperature for coffee).
- Add 2 tablespoons of coffee to your pot for every 8 ounces of water.
- Stir the grounds and let sit for 2 minutes.
- Stir the grounds for the last time and let the pot sit for another 2 minutes.
- With 4 minutes of total time, add a little cold water to settle the grounds at the bottom of the pot.
- Pour your coffee slowly, so grounds don’t flow in your cup.
A vital step to this is making sure you have the right pot, with small holes to catch any floating grounds. This is the pot that I use.

Making Coffee With a Percolator:
I do this a little differently than most people. So if your percolator came with instructions, they woulde a little different.
- Start with a clean pot. Make sure all the coffee grounds from the last time you used it are gone.
- Pull the basket out, fill the pot with water.
- Start warming up the water before putting the basket full of grounds in. This is where I do things a little differently. I don’t want the water warming up and heating the grounds. This will make a smoother cup of coffee.
- After a few minutes of heating water (but not boiling), put the basket inside the pot.
- Perk for around five to seven minutes. Never let the pot boil; keep the heat medium to medium-high.
This is the coffee percolator that I use and recommend.

Coffee Makers for Camping
There are tons of dedicated coffee-making devices for making coffee when going camping and hiking. Let’s go over some of the best coffee makers for the outdoors!
GSI Outdoors, French Press Coffee Mug

This is a cool travel mug. It will make coffee like a French press, but you don’t need to pour it into a separate coffee mug. You can drink your fresh java press straight from the container.
With this mug, it cuts down on a another thing you’ll have to carry with you, one less thing to put in your camping bag.
You can see if the JavaPress is still available here.
Stanley Adventure All-in-One, Boil
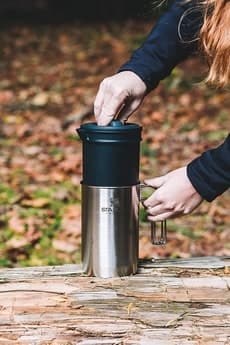
I like the compact design that makes it great for camping.
It’s really a french press that is stainless steel that you can also drink out of. Also, you’ll use it to boil the water, so no need for a separate pot in the morning. I use a glass french press at home, and I’d never take that out camping with me because it would break easy.
That’s what makes a dedicated one for camping and hiking worth it. Just through it in your hiking pack, and don’t worry about it breaking.
You can see the current price of the Stanley Adventure French Press here.
Wrapping Up
There are a few different ways of making coffee during a camping or hiking trip, but my preferred method will always be the AeroPress.
For a large group, stick to a cowboy coffee pot or percolator.
If you have a great way of making coffee when you’re out on the trail, I’d love to hear it down in the comments!
If you’ve been using the same beans for a while, it might be time to change it up. Please take look at our article, Different Kinds of Coffee Beans: What are you missing out on?
